The beginning of 2012 began a flurry of sales of the R1M & MX models, complete with all kinds of accessories, with some asking prices dropping way below their worth. I’m not sure what actually happened. It was if there was a knee jerk reaction amongst certain RED owners, much to the disapproval of the RED community. Either way, if you are in the market for a cinematic camera system, there really couldn’t be a better time to check out the used RED market. Certainly, there are many rental houses and private individuals selling complete RED One outfits and bargains are definitely to be had. However, before jumping too quickly into a purchase, it should be noted that there are quite a few things to consider. Having spent a good deal of time researching this I have passed on my own comments below.
Note: With all the marketing hype surrounding camera equipment these days, it needs to be understood that 4K professional film projects are not cheap to produce and there are many factors involved in the complete end to end of such productions. It’s a bit like buying a boat; having shelved out all your pennies to purchase the craft, you then find you can’t afford to fill the fuel tanks let alone the accessories that help navigate safely.
1: M or MX? – While the RED One M (M was the first sensor model) was the first chip release, and as long as the firmware has been updated (free download from RED website support), this model is a highly capable camera and can be sent into RED Service for an MX upgrade (firmware downloads available from website), although this is quite costly (approx $5,000.00 at 2012). Ideally, purchasing the MX upgrade model is definitely more desirable as it will also be more sellable should you wish to do so after your project.
2: Confirming Camera Details – Powering the camera up (approx 60 second boot time) will show on the monitor what chip is installed – you will see a big “X” if it has the latest MX Chip. Pushing in the “Clear Button” and depressing the “Centre Toggle” on the back of the camera, you can find out “Hours” of Use, the “Firmware Version” and the “PIN Number” (required to download firmware from the RED support website). The serial number is on the bottom of the camera and should be checked against the “stolen register” on the RED website and others.
It should be noted that a camera with over a thousand hours means nothing as the only moving part is the fan which, over time, can get noisy and may need replacing.
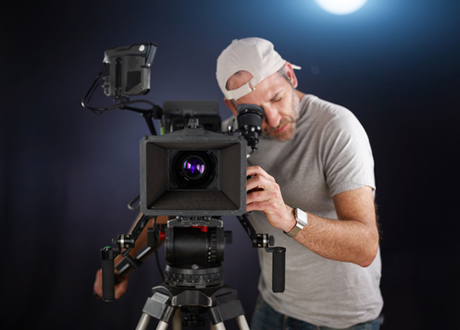
3: Accessories – The cameras can be sold with a variety of accessories and it is here that you really need to make sure that you get what you need or you will find your camera budget increasing greatly. For most applications you will be looking for a monitor (5″ or 7″ – 7″ is very nice to work with) and / or an EVF (Viewfinder) complete with cables (cables approx $200 + each! – if you can, double up for backup). Hard drives (no longer made) are excellent for those needing long recording times although care needs to be exercised where excessive vibration or movement exists – dropped frames can be a problem. A camera that comes with a CF module or SSD module (left side of camera) is most desirable for a camera on the move – however, useable SSD modules are expensive. You will need rails / rods and fixing plates for the camera so that a battery and / or hard drive housing can be attached as well as grips for hand holding, carrying and for attaching a Matte box – you will need a 19mm to 15mm adapter to accommodate 15mm box or Follow Focus attachments. You will require V-Lock batteries and a charger; Red’s batteries tend not to get the best reviews in the world and some people prefer to use other makes such as IDX (see our test below). A mains supply unit is very welcome for those long shoots where electrical supply and camera movement is not an issue. Like all high quality cameras, power drain must be taken into consideration. Make sure that you get all the necessary cables to connect up devices such as the adapters needed for the mini audio and SDI connectors. A handy unit is the SDI breakout box which fits over the mini sockets to enable industry standard BNC connections. While there are many accessories, those listed are the usual items.
4: Lenses – The R1MX is of course a cinematic camera and, as such, comes with a PL mount for the mounting of cinematic PL mount lenses. High quality lenses are, of course, expensive and, for many on a budget, you can either hire them for a job or you can opt for using Nikon / Canon or similar glass via a proprietary mount available from RED. While there are pros and cons regarding lens types and methods used, it usually comes down to budgets and personal choice.
RED developed their own lens brand in the form of the RED Pro Prime and Zoom collection and these high quality lenses are very good value for money. The main complaints tend to be about the weight and lack of lens markings. While these points may be valid for some, there is no doubt that they are excellent value and can rival, and even better, lenses much greater in price.
5: Editing – Shooting 4K raw data requires a lot of grunt and if you are serious about production then you need to think about getting a RED Rocket graphics card for real-time playback and greatly accelerated transcoding times, particularly slo-mo footage shot at 120fps.
You will also need to download REDCINE-X (also Pro Beta version available). This free software is where you will transcode the .R3D files (the proprietary raw file format used) into your file format of choice to be transferred to your NLE editing software. REDCINE-X also allows you to colour correct clips as well as small colour grading options (Pro-X does much more). Of course, if you desire high end grading then you would export your clips into your software of choice but you need to watch for your computer freezing or locking up if your complete through-workflow is not up to the task.
6: Manuals – As with most things, reading the free downloadable manuals will pay dividends and help you make informed choices. A casual look on some forums can lead you to believe that there are all kinds of issues and stumbling blocks involved, particularly as there is so much old information on the web; but I have to say that most of the issues that get raised are down to individuals not understanding even the basics of what the manuals clearly outline. Production at this level is complex, yet with patience and a methodical approach, most will be able to learn.
7: Buyer Beware? – In general, the camera is built like a tank and the only moving part inside is the fan (If it gets noisy it needs replacing). Clearly, common sense should prevail; a camera system that has had a lot of “hire usage” may suffer cosmetic blemishes, worn threads and the usual wear and tear. It should be safe to say that hire firms will keep their equipment regularly serviced and firmware up to date, while owner operators range from those who do very little work and treat their gear well to those who give their equipment hard use and a hard time.
8: Servicing / Repair – Depending on your location, servicing or repair is definitely something you need to consider so find out where your nearest service center is and give them a call to see what’s available. In the UK, the service center is based in Pinewood Studios. Please note that servicing / repairs can be costly.
